
If your gaming PC is starting to struggle, don’t assume you need a completely new system. The right upgrade depends on what is actually holding it back—whether that’s your GPU, CPU, RAM, or storage.
In this guide, I’ll show you how to find the real bottleneck, choose the upgrade that will make the biggest difference, install it safely, and verify the results afterward. By the end, you’ll know whether your PC needs a targeted upgrade, where I would spend my budget on, and when upgrading no longer makes financial sense.
Does Your Gaming PC Really Need an Upgrade?
Before spending money on an upgrade, I’d first make sure my PC is actually holding back my gaming experience. A quick check of performance and bottlenecks can tell me whether I need an upgrade or should simply keep using my current setup.
- Check your FPS: If your games already run well at your target settings, I’d leave the PC alone.
- Find the bottleneck: I’d check whether the GPU, CPU, RAM, or storage is causing the problem.
- Upgrade the problem: I’d only replace the component that is actually limiting performance.
- Compare the cost: If several components need upgrading, I’d compare the total cost with a new PC.
- Don’t upgrade unnecessarily: If the PC still meets my needs, I’d save the money and upgrade later.
If your PC isn’t performing well i’d prioritize you to upgrade it. Below are the practical steps you should follow.
What You’ll Need
Tools:
- Phillips-head screwdriver (#2)
- Anti-static wrist strap (or touch bare metal regularly to discharge static)
- Optional: zip ties for cable management after the install
Software (download before you start):
- Task Manager or MSI Afterburner — to identify your bottleneck
- GPU-Z — to verify your graphics card specs
- Your new component’s driver package—save it to a USB drive
Estimated budget:
- RAM upgrade: $40–$80
- NVMe SSD: $60–$120
- GPU upgrade: $250–$700+ depending on your target tier
Step 1: Identify Your Bottleneck — Don’t Skip This
The most common upgrade mistake is buying the wrong part. Before you spend a dollar, find out what’s actually causing your performance issues.
Open Task Manager (Ctrl + Shift + Esc) and go to the Performance tab. Launch a demanding game and watch the readings:
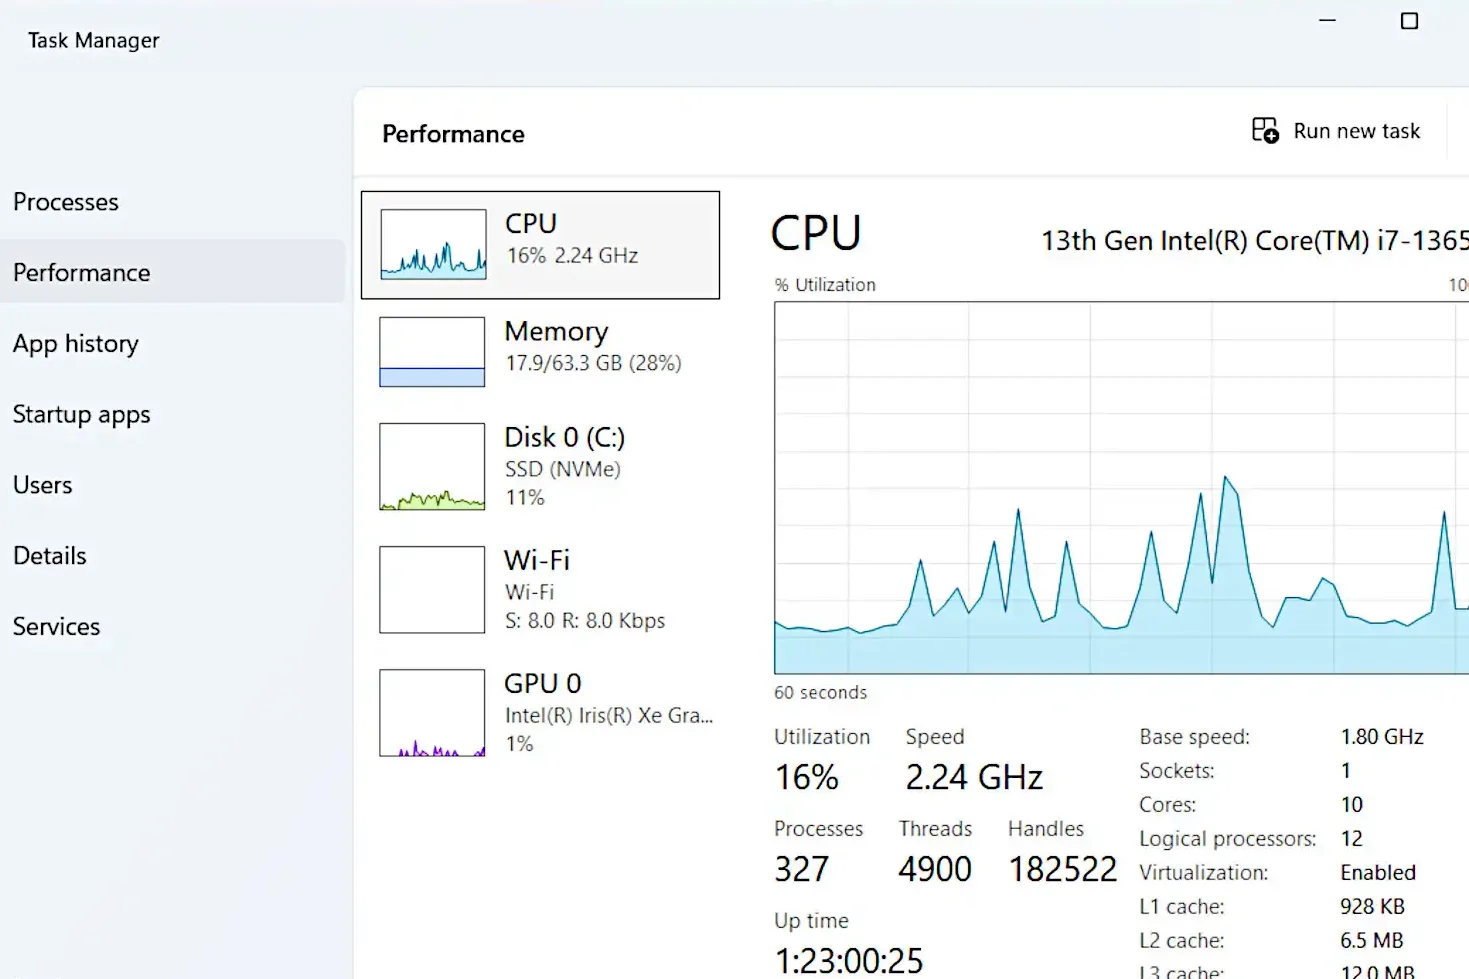
- GPU near 99%? Your graphics card is the ceiling — upgrade it.
- CPU at 90–100%? Upgrading the GPU alone won’t help; the processor is the problem.
- RAM maxed out or under 32GB? More or faster memory is your move.
- Load times painful but GPU/CPU look fine? You’re probably still on a SATA SSD or HDD — an NVMe upgrade will cut load times dramatically.
Run MSI Afterburner with the RivaTuner overlay to monitor all of this inside your actual game. Spend 15 minutes here before spending hundreds on parts. For a deeper breakdown of what each metric means, how to choose PC parts is a great next read.
Step 2: Choose the Right Upgrade Path
Once you’ve identified your bottleneck, pick the upgrade that actually addresses it:
- GPU — the single biggest FPS impact for most gaming setups
- RAM — critical if you’re under 32GB in 2026, or if your sticks are running at base speed without XMP/EXPO enabled.
- CPU — necessary when your processor is actively capping your GPU, but socket compatibility matters; verify your motherboard supports the new chip
- NVMe SSD — if you’re on a SATA drive, the jump to PCIe Gen 4 NVMe is immediate and dramatic
Step 3: Prepare Your PC Before Opening Anything
Don’t crack the case open yet. First:
- Download your new component’s drivers to a USB drive — you’ll want them ready before Windows tries to find them automatically.
- Back up important files — the installation itself isn’t risky, but hardware work is always a good excuse to run a backup.
- Fully shut down — not sleep or hibernate. A complete power-off.
- Unplug the power cable from the back of the PC.
⚠️ Static discharge can silently kill components. Before touching anything inside the case, touch a bare metal part of the chassis to ground yourself. An anti-static wrist strap is the safer option if you have one.
Step 4: Remove the Old Component
Remove your case’s side panel — most mid-towers use thumbscrews. Set it down on a non-carpeted surface.
Removing a GPU:
- Unplug the PCIe power connectors (the 6+2-pin cables running to the card)
- Unscrew the two bracket screws at the back of the case
- Press the PCIe retention latch on the motherboard to release the card
- Slide the card straight out—no prying or rocking needed
Removing RAM:
- Press both retention clips outward simultaneously
- The stick will pop up at an angle—lift it cleanly out of the slot
If anything feels stuck, look for a latch or screw you’ve missed. Nothing in a well-built PC should require force.
Step 5: Install the New Component
Installing a GPU:
- Align the gold contacts with the PCIe x16 slot (the longest slot on your motherboard)
- Press down firmly and evenly until you hear and feel the latch click
- Screw the bracket back into the case
- Reconnect all PCIe power cables — they must click in fully; a loose connector will cause the GPU to fail to power on
Installing RAM:
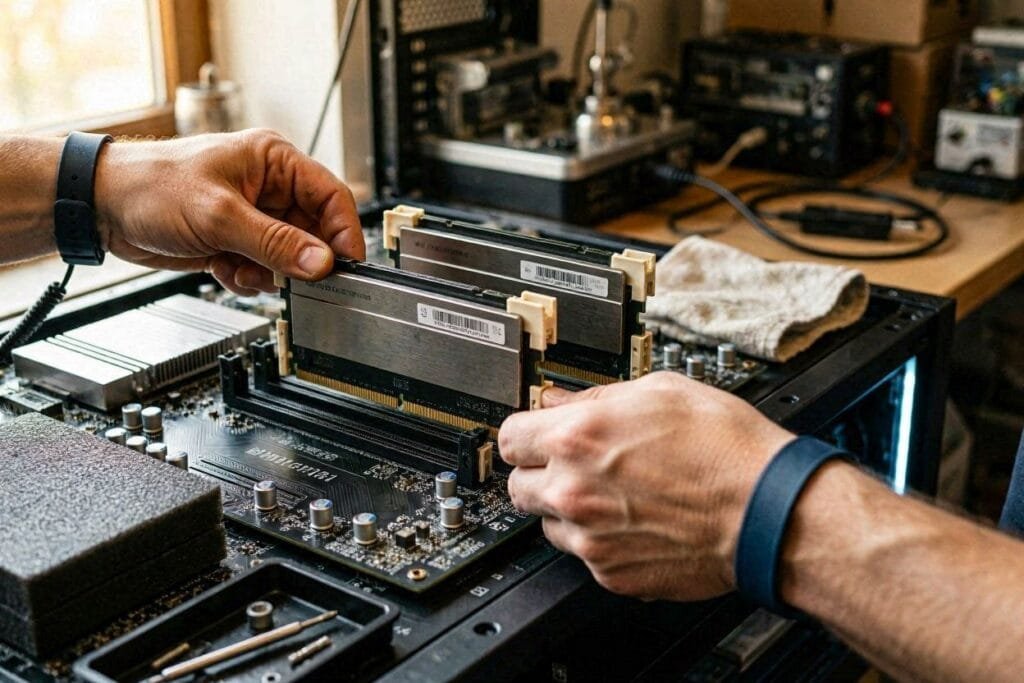
- Match the notch on the stick to the slot’s key
- Press both ends down evenly with firm, steady pressure — both clips should snap up when seated
- RAM requires more force than most people expect; that satisfying click is your confirmation it’s in
For a full walkthrough of dual-channel setup, slot pairing, and what to do if your system won’t POST after a RAM install, see upgrading RAM for gaming..
Step 6: Boot Up and Configure
Plug the power cable back in and boot your PC.
After a GPU swap:
- Windows may boot at low resolution initially—this is normal
- Install your GPU drivers from the USB or from NVIDIA, AMD, or Intel’s site directly
- Restart after the driver install completes
After a RAM upgrade:
- Enter your BIOS on boot (usually Delete or F2 during startup)
- Find the XMP (Intel) or EXPO (AMD) setting and enable it
- Save and exit — without this step, your RAM runs at base speed regardless of what the packaging says
Run a 10-minute gaming session or a quick benchmark to confirm the upgrade is stable and performing as expected.
Troubleshooting Common Upgrade Problems
PC won’t display anything after GPU install: Check that every PCIe power cable is fully clicked in. Also confirm your monitor cable is plugged into the new GPU — not the motherboard’s display output.
RAM isn’t running at rated speed: Enable XMP (Intel) or EXPO (AMD) in BIOS. It’s off by default and this is the #1 missed step after a RAM upgrade.
System crashes or freezes after RAM install: Reseat the sticks. If the issue continues, test with one stick at a time to identify a faulty module.
New GPU isn’t detected by Windows: Use DDU (Display Driver Uninstaller) in safe mode to fully strip the old drivers before installing new ones — Windows sometimes holds onto old driver remnants that cause conflicts.
CPU upgrade results in no boot / no display: Your motherboard BIOS may need a firmware update to support the new processor. Some boards require updating with the old CPU still installed first — check the manufacturer’s CPU support list and BIOS version requirements before assuming your chip is dead.
Where Would I Spend More of the Budget?
If I were upgrading my gaming PC, I’d put most of the extra budget toward the component that is actually causing the bottleneck rather than spreading the money across unnecessary upgrades.
- GPU: I’d prioritize the GPU if it is consistently near 99% usage, because it usually has the biggest impact on gaming FPS.
- CPU: If the CPU is reaching 90–100% and limiting the GPU, I’d put more budget toward the processor instead.
- RAM: If I’m below 32GB or consistently running out of memory, I’d allocate part of the budget to RAM before chasing faster components.
- Storage: If the system is still using an HDD or SATA SSD and load times are the main problem, I’d spend on a PCIe Gen 4 NVMe SSD.
- Multiple bottlenecks: If several major components need replacing, I’d stop putting money into individual upgrades and compare the total cost against building a new PC.
My rule: I’d spend more where the performance bottleneck is—not simply on the most expensive component. The first step is always to identify what’s actually limiting the system.
People Also Ask For
Check the GPU’s length in millimeters — it’s listed in the spec sheet — and compare it to your case’s maximum GPU clearance, which is in the manual or on the manufacturer’s product page. Clearance under 300mm can rule out many high-end cards.
No. Windows handles GPU swaps cleanly. Install the new drivers, restart, and you’re done.
Go to your motherboard manufacturer’s website, find your exact model, and check the CPU support list. Compatibility is socket- and BIOS-version dependent. If you’re evaluating a new processor, our how to pick a CPU guide covers socket matching, TDP requirements, and performance tiers.
Yes, particularly if you’re under 32GB in 2026, running a single-channel configuration, or if your RAM is running at base speed without XMP enabled. The FPS improvement is most visible in CPU-bound scenarios and can range from 5–15%.
As a rule of thumb: GPU every 3–4 years for meaningful generational gains, RAM when you hit the ceiling or a new standard becomes dominant, and storage whenever you run low or upgrade your OS drive. A well-chosen single upgrade can extend a system’s useful life by 2–3 years.
Final Words on How To Upgrade My Gaming PC
Knowing how to upgrade your gaming PC is one of the most useful skills you can have as a PC gamer. A targeted upgrade — done in an afternoon — can deliver performance gains that feel like a new machine, at a fraction of the cost.
If you’ve followed every step here, your system should be running noticeably better. Your next move is benchmarking before and after to quantify the gain, then monitoring for a week to confirm long-term stability.
And if this upgrade revealed that more components need replacing than it makes sense to patch together, that’s a normal discovery. Head over to how to make a computer from scratch — it’s the complete guide to planning and building a fresh system from the ground up, and it pairs directly with what you’ve just learned here.
